Some Useful Tips on Making a Collage Tarot Deck
Save Everything.
Collect magazines, art books, old photos, greeting cards, and handmade paper. Frequent used bookstores which
have a good selection of art books and magazines.
It's important to note that if you are making this deck for personal study or for teaching purposes you
needn't worry about copyright protected imagery. However if you are hoping to publish your deck you have to be
careful not to use any images that are still protected under current copyright law. It is usually safe to use
images that are 75-100 years or older combined with your own art
but keep good records of all artwork used (the title, artist, year and owner or museum).
Cut out and separate images into categories.
Pawing through magazines when you are meditating on a card can be very distracting, whereas if
you keep a large assortment of pictures, colored paper, & symbols in separate
containers it can be very meditative to look through them until you find the ones that fit
your vision of the card. The act of collecting images in itself has the effect of casting
your empty net out and gathering all manner of food for thought from the collective
unconscious. I have my trimmed images in boxes labeled:
People, Art, Symbols & Icons, Buildings & Human Constructs, Animals & Nature.
I have a separate box for
Words.
Buy a couple packs of blank index cards or a blank deck.
You can buy a blank deck from US Games for around $10. Or if you prefer to use index cards,
you can buy a corner cutter at a craft or rubberstamp store for around $8.
Other important supplies:
Stick glue and rubber cement - I tend not to use white glue as it warps paper. While I'm gluing I use a discarded
magazine, placing my piece to be glued on a page and then folding over the page so I
always have a clean area to work on. Dual point markers such as Tombow brand are good for
blending and touch up. Sharp scissors are crucial. For detail work I use a small pair of
cuticle scissors that are sold at beauty supply shops. My preferred brand is Tweezerman.
It's also good to have packs of stars, gold dust, & glitter on hand. Rubber stamp
stores sell great textured papers, special effect gizmos and hole punchers with shapes such as leaves,
butterflies, hearts, stars, etc., which can be used as an interesting 2 layer effect with
a cool background showing through or to place the cut symbols upon a section of the card.
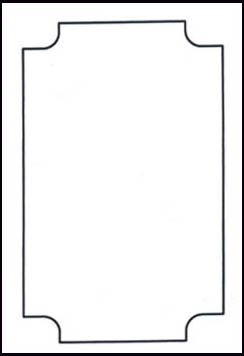
Make a view window (if you care to have a border around your imagery).
From a piece of cardboard measure and cut out a window which shows the exact size of your cards. By placing
this window over one or more images you can quickly choose what you want to use or combine in a
card. I also save the inside of the window for outlining backgrounds for my cards. You can
make your cards larger and color copy and size them down later. I'll include a blank card
below which can be copied onto cardstock to work with and make a view window from. You can right click on the
image and save it to print later.
Your Tarot journal will come in handy:
If you've been recording your impressions of the cards as well as those of friends, teachers and books that
resonate with you, this will be very helpful to study while meditating on your card's
personal meanings and atmosphere. Books like the Dictionary of the Tarot by Bill Butler or
the Encyclopedias of Tarot by Stuart Kaplan are also very useful as a resource for
multiple card interpretations.
Music, incense, candles and any rituals
that have personal relevance are very helpful for getting in the mood. You may find it useful
to set aside a certain time on a regular basis dedicated to making your deck. That way you
condition yourself to honor this creative time and space.
When you have finished your cards: you may want to color copy them (or print out if
you have a decent scanner and printer)
and glue the fronts onto a decorative back. Trim them to size before laminating
them. Laminating your original deck will make it difficult to obtain clear copies of it (for one thing, the
plastic sometimes reflects off the glass of the copy machine.
For more details on making and publishing your own Tarot deck, see my essay
here
.
The creative process:
In creating your deck it's sometimes a good idea to perceive yourself as the writer, director, producer and
cast of a hand made film. Keep the somewhat detached role of a director while putting yourself in each of the
roles of the cards and seeing how you respond to their themes in your own life. Stay committed to your
personal vision and you will also be depicting universal themes almost anyone can relate to. By keeping your
deck personal it will entice you to delve deeper and keep you enthralled. Every image, symbol, color, texture
and number of objects can have meaning and will give your mind many areas to free associate and connect with
later while meditating and reading with your deck. You don't have to analyze what these images mean yet, just
trust your intuitive nature and it will all fall into place later. Select imagery that evokes in you a range
of emotions, as well as things that depict your beliefs, goals, aspirations, challenges, fears, etc.
Look for images that represent your past, present and potential future. Combining opposing or conflicting
imagery in a collage can help you perceive things from different perspectives as well as give your cards
layers of possible meanings. Most of all, have fun and enjoy the journey!
